
Registered Nurse | Healthcare Experience Since 2009
This page explains how to perform range of motion (ROM) exercises on a patient. Included are pictures that highlight how to perform common passive ROM exercises.
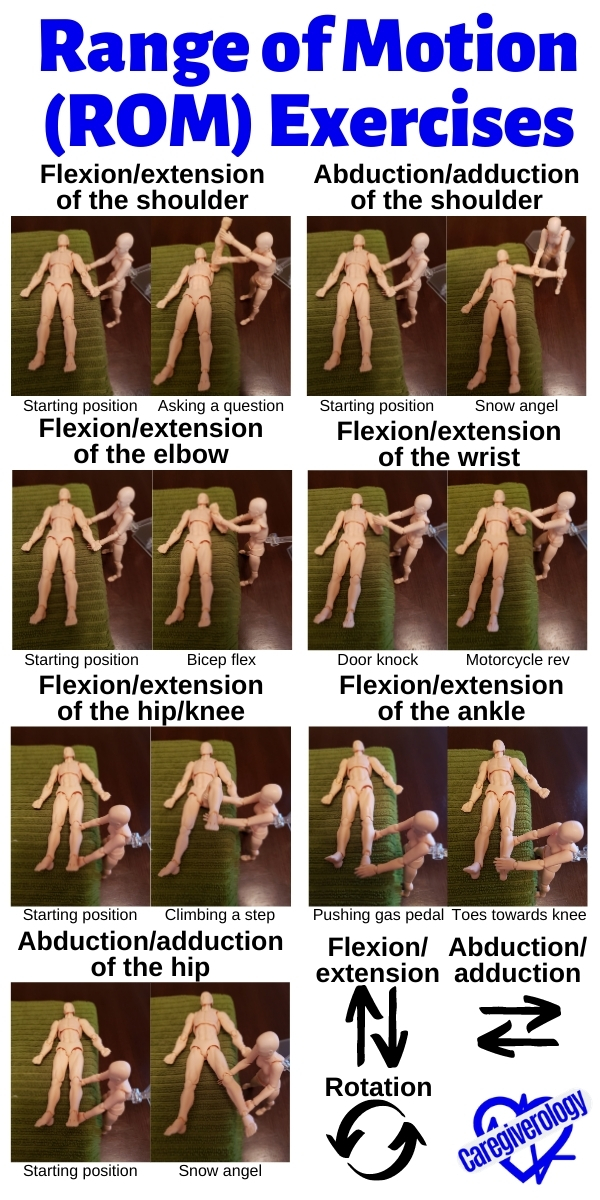
Click here for a poster of these exercises
Table of Contents
Why Perform Them?
Why perform them to begin with? If your patient is on bedrest and isn’t active, their muscles can atrophy. Atrophy means their muscle mass decreases because they aren’t being used. There is also a decrease in the mobility of joints. This causes issues such as not being able to walk or do basic tasks due to generalized weakness.
The Two Types
The two types of range of motion exercises are active and passive.
Active is when the patient can perform the exercises themselves. They just need assistance on how to do them. It is important to make sure they are doing them correctly and performing enough repetitions.
Passive is when they require assistance to perform the exercises. They may even be totally dependent on you doing the exercises for them.
Types of Motions
There are three different types of motions that are used depending on the extremity and joint.
- Flexion and extension is done in an up and down motion.
- Abduction and adduction is done in a side to side motion.
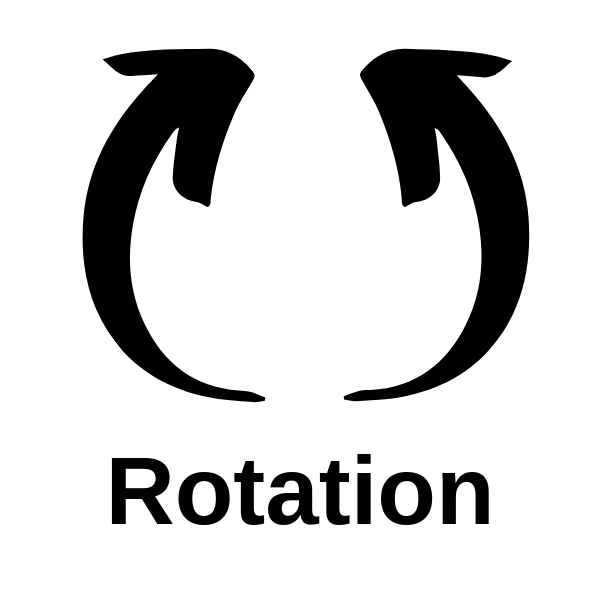
- Rotation is done in a circular motion.


What is the Goal?
What is the goal of these exercises? Does the patient need to regain their strength or simply retain the strength and movement that they already have? If the order is given by physical therapy (PT), they often prescribe exercises to overcome an injury or the effects of a particular illness by regaining function.
More often than not, ROM exercises are done in order to retain the current level of ability in extremities. Therefore, they are usually done on healthy extremities and should not cause pain. If pain is experienced during an exercise, the next repetition should be done below that pain threshold in order to maintain comfort. If pain is experienced, it should be noted and possibly reported depending on the severity. Click here for more about pain management.
Performing Passive Range of Motion Exercises to Major Extremities
Step by Step Instructions
This is a set of step by step instructions based on the clinical skills portion of a CNA exam although they can also be followed in a real world setting. In this particular case, the patient is simply lying in bed and needs passive assistance.
Step 1: Perform your opening duties.
- Knock on the door.
- Introduce yourself.
- Explain your title.
- Identify the patient.
- Describe the skill.
- Obtain permission.
- Close the privacy curtain.
- Perform handwashing.
Step 2: Prepare the patient.
- Raise the entire bed height to a
comfortable working position if desired. - Place the patient supine (flat) in
the bed. - Adjust them towards the center of
the bed if necessary. - Move everything out of the way in
order to perform the exercises properly (blanket, bedside table, etc.).
Step 3: Ensure all of these precautions are taken during the exercises.
- Support each joint while
performing the exercises by cupping underneath extremities and gently lifting
rather than gripping an extremity from above in a claw-like fashion. - Move all joints slowly and gently
without overextending and causing pain. Only move to the point of resistance. - If pain does occur, perform the
next exercise by stopping movement below the pain threshold as to not cause
pain again. - Describe each exercise to the
patient immediately before performing them. - Only perform exercises on sides
and joints that are listed in the care plan or physician orders. (example: “left shoulder only”
would exclude the right shoulder). - Repeat exercises only as many
times as directed in the care plan (example: three reps).
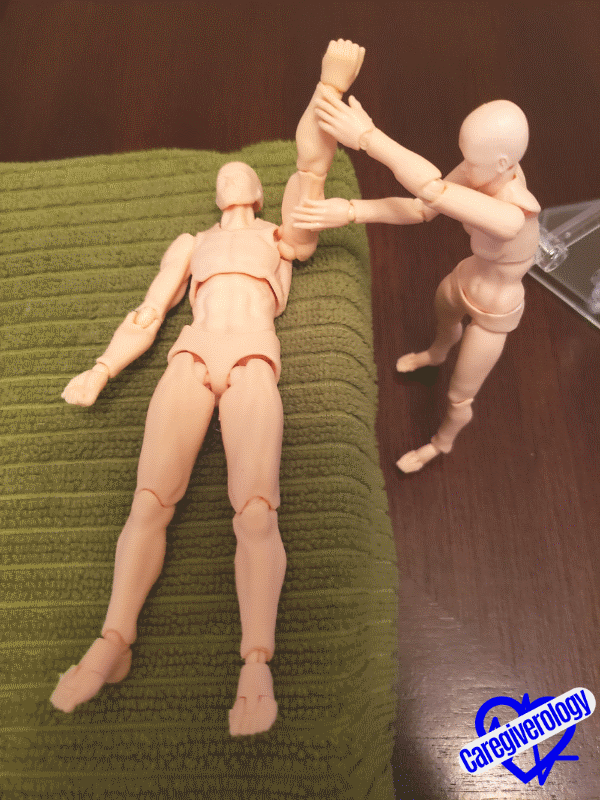
Step 4: Flexion and extension (up and down motion) of the shoulder.
- Straighten the patient’s arm flush
against their side and lay it flat on the bed. - Cup underneath the patient’s elbow
with one hand and cup underneath their wrist with your other hand. - Raise their arm at the shoulder
joint above their head and towards the head of the bed as if they were needing to ask a
question. - Gently lower the arm back down to
its original position on the bed. - Repeat as necessary.

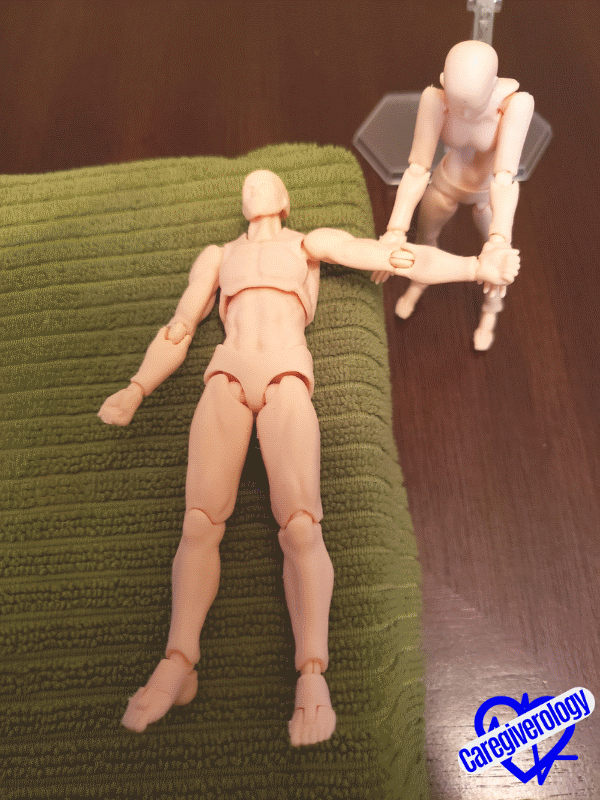
Step 5: Abduction and adduction (side to side motion) of the shoulder.
- Straighten the patient’s arm flush
against their side and lay it flat on the bed. - Cup underneath the patient’s elbow
with one hand and cup underneath their wrist with your other hand. - Move the arm sideways and away
from their body at the shoulder joint as if they were making a snow angel. - Gently move the arm back to its
original position on the bed. - Repeat as necessary.
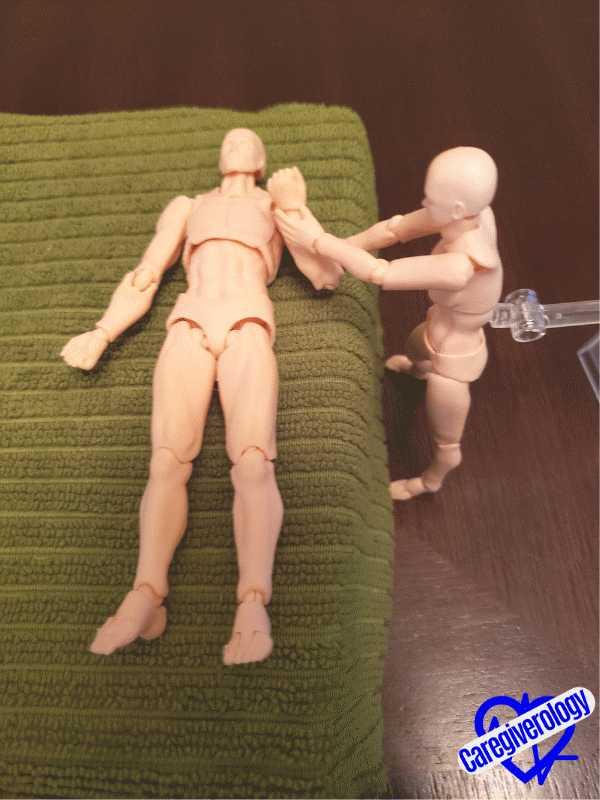
Step 6: Flexion and extension (up and down motion) of the elbow.
- Keep the patient’s elbow on the
bed with their palm facing up throughout this exercise. - Straighten the patient’s arm flush
against their side and lay it flat on the bed. - Cup underneath the patient’s wrist
with your hand. - Lift their lower arm straight up
and bring it towards their shoulder by bending it at the elbow joint as if they
were flexing their bicep muscle. - Gently move the arm back to its
original position on the bed. - Repeat as necessary.
Step 7: Flexion and Extension (up and down motion) of the wrist.
- Keep the patient’s elbow on the
bed with their palm facing up throughout this exercise. - Straighten the patient’s arm flush
against their side and lay it flat on the bed. - Cup underneath the patient’s
forearm with one hand. - Lift their lower arm straight up
by bending it at the elbow joint. - With your other hand, curl their
fingers into a fist and gently grip their fist. - Bend their fist forward to the
point of resistance without causing pain as if they were knocking on a door. - Then bend their fist backwards to
the point of resistance without causing pain as if they were twisting the
throttle of a motorcycle. - Return the fist back to its
original position. - Repeat as necessary.
- After all of the reps are done,
gently place the patient’s lower arm back onto the bed.
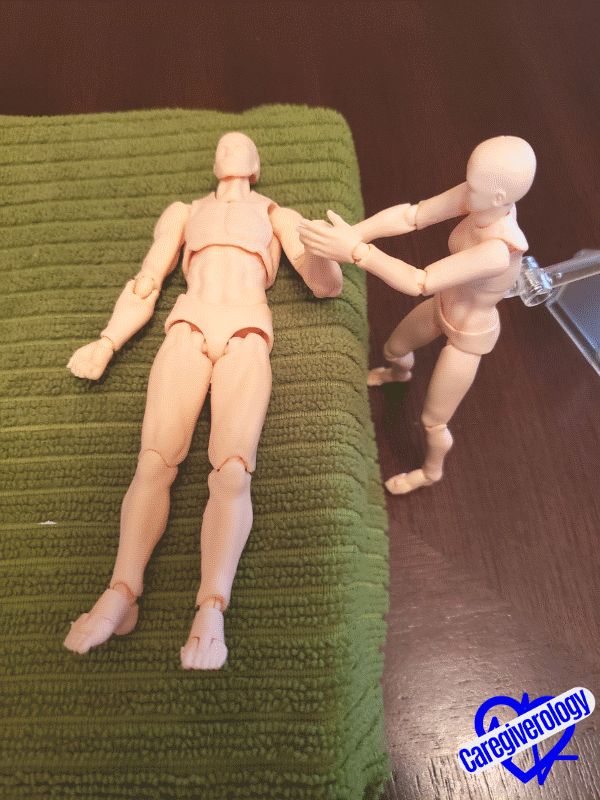
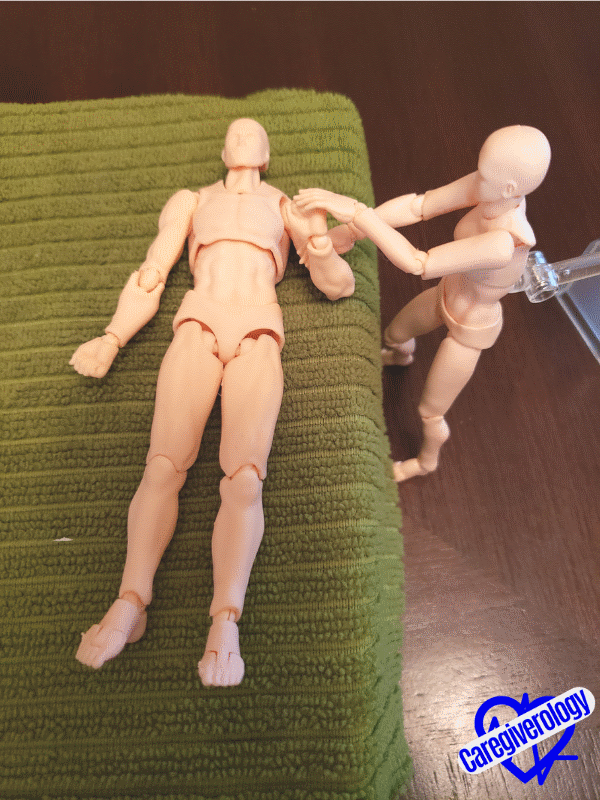
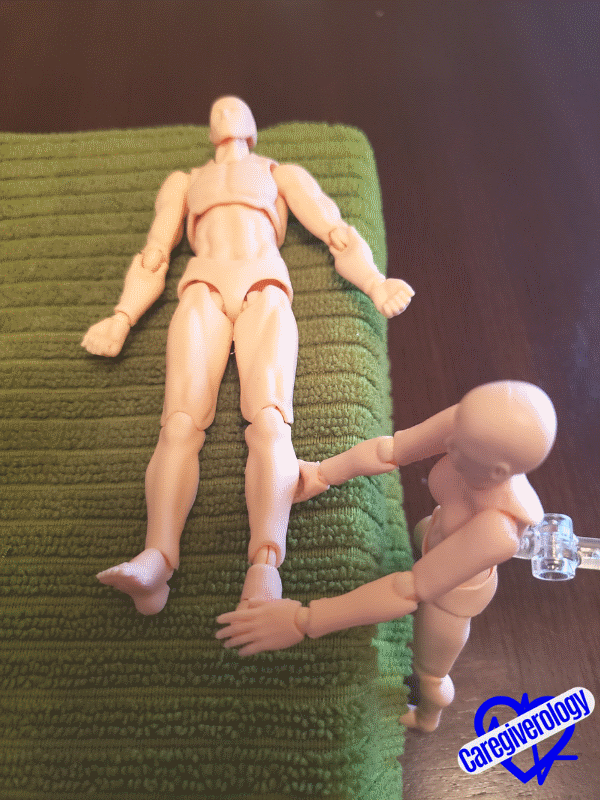
Step 8: Flexion and extension (up and down motion) of the hip and knee.
- Straighten the patient’s leg flush
against the bed. - Cup underneath their knee with one
hand. - Cup underneath their ankle with
your other hand. - Lift their thigh (upper leg) up
from the bed by bending at the hip joint while simultaneously keeping the calf
(lower leg) straight by bending at the knee joint. This motion should bring
their knee towards their chest as if they were climbing up a step. - Return the leg back to its original position.
- Repeat as necessary.
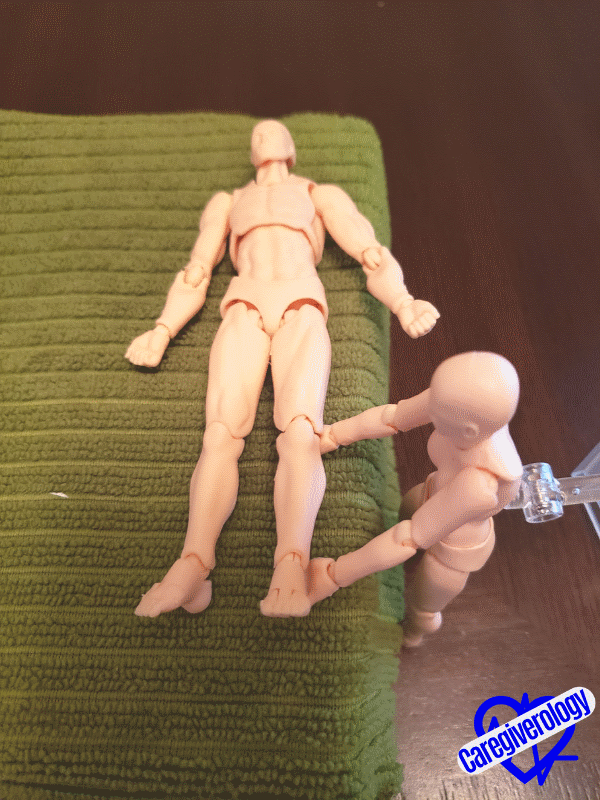
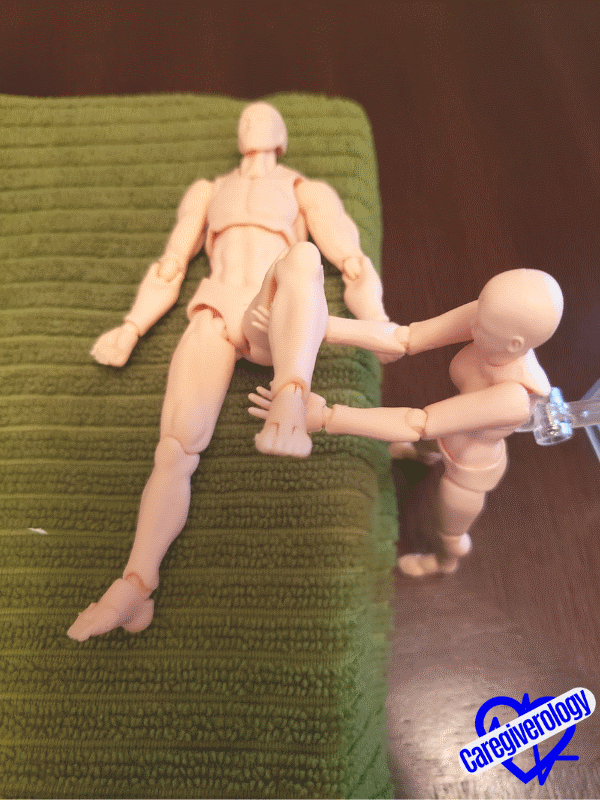
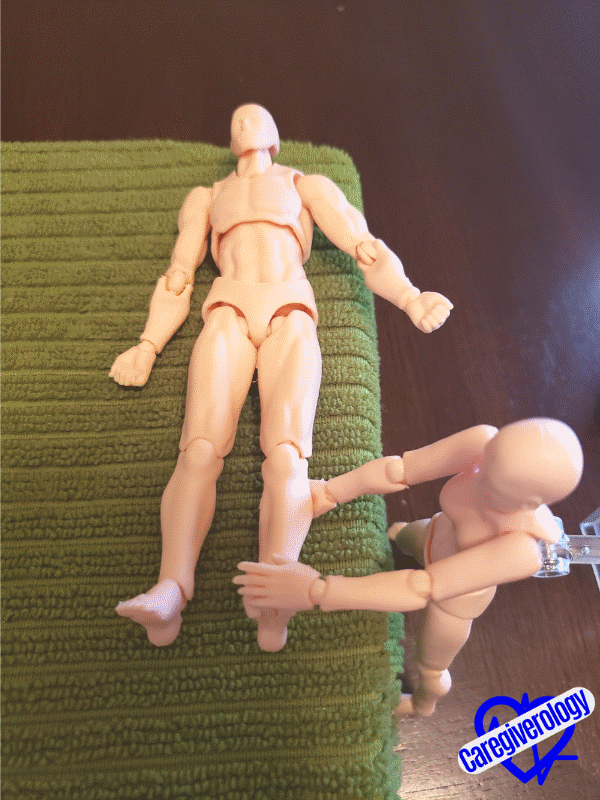
Step 9: Flexion and extension (up and down motion) of the ankle.
- Straighten the patient’s leg flush
against the bed. - Cup underneath their calf (lower
leg) with one hand. - Raise the leg up slightly off of
the bed. - Gently grasp the top of their foot
with your other hand. - Bend their foot forward and down
towards the bed at the ankle joint as if they were pushing on a gas pedal. - Then bend their foot backwards at
the ankle joint bringing their toes up towards their knee. - Return the foot back to its
original position - Repeat as necessary.
- After all of the reps are done,
gently place the patient’s leg back onto the bed.
Step 10: Perform your closing duties.
- Place the call bell either in the
bed with the patient or within their reach. - Adjust the head of the bed if
desired. - Keep the entire bed height in the
lowest position. - Make sure the bed alarm is on if
necessary. - Open the privacy curtain if
desired. - Ask the patient if they are
comfortable and if they need anything else before you go. - Check to make sure everything is
clean and in its proper place. - Adjust the lights if needed.
- Ask about the door being left open
or closed. - Perform hand hygiene.
Other ROM Exercises
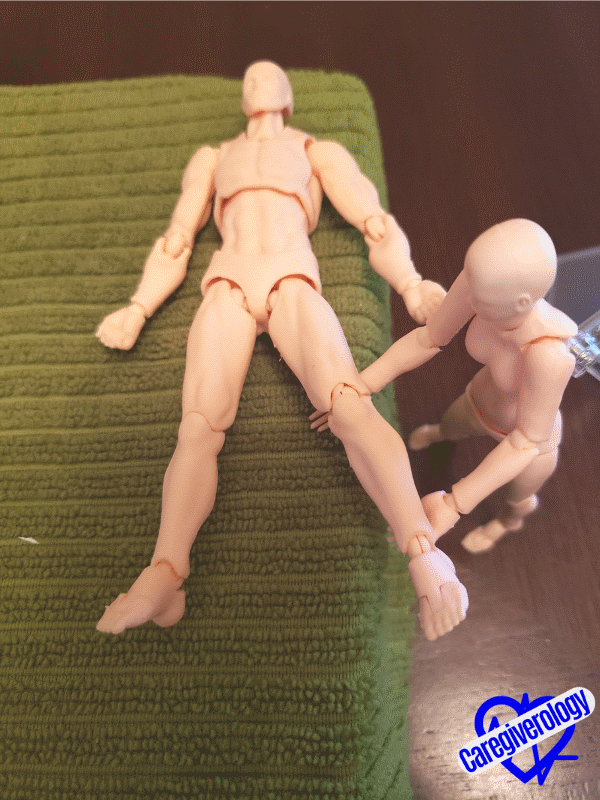
Hip Abduction and Adduction
With one hand, cup underneath the patient’s ankle and with your other hand, cup underneath their knee. While keeping the knee straight, move the leg towards you to about a 45 degree angle if the patient can tolerate it. Then bring the leg back to it’s original position. This should look similar to making a snow angel.
Neck Rotation, Flexion, and Extension
Rotation (side to side): With one hand, support the patient’s neck. With your other hand, gently turn the neck from side to side.
Flexion (up and down sideways): With one arm and forearm, support the neck. With your other hand, gently tilt the head down to one side. This should bring the ear down closer to the shoulder.
Extension (up and down straight): Bow the head straight down toward the chest and then return it back to a comfortable position.
Hand and Wrist Flexion and Extension
Wrist Flexion: While gently grasping the wrist in one hand, use your other hand to rock the hand side to side as if the patient were trying to wave at someone.
Finger flexion and extension: While gently grasping the wrist in one hand, use your other hand to curl the patient’s fingers into a fist and then straightening them out.
Spread the patient’s fingers out and tilt each finger individually side to side.
Bring the thumb over the palm and towards the pinky.
Touch the tip of each finger to the thumb.
Final Thoughts
It is important to note that there are many more range of motion exercises that a patient can perform. This is just a summary of some of the most common ones. Again, I want to emphasize to have a clear order from physical therapy of all of the exercises the patient needs and be sure not to cause pain while performing them.
If you have any questions or if there are exercises you are unclear about or ones that are not listed here, please let me know in the comments down below.
What are the Duties of a Caregiver?
Medical References and Resources for Caregivers
References:
https://alsworldwide.org/assets/misc/RANGE_OF_MOTION_EXERCISES_WITH_PHOTOS_copy.pdf
https://www.drugs.com/cg/active-range-of-motion-exercises.html
Shop range of motion exercise equipment on Amazon
Save This Guide
%20exercises%20on%20a%20patient%20%23caregiverology%20%23rangeofmotion%20%23rom%20%23romexercises%20%23activerom%20%23passiverom%20%23flexion%20%23extension%20%23abduction%20%23adduction%20%23rotation%20%23bedrest%20%23atrophy%20%23arthritis)